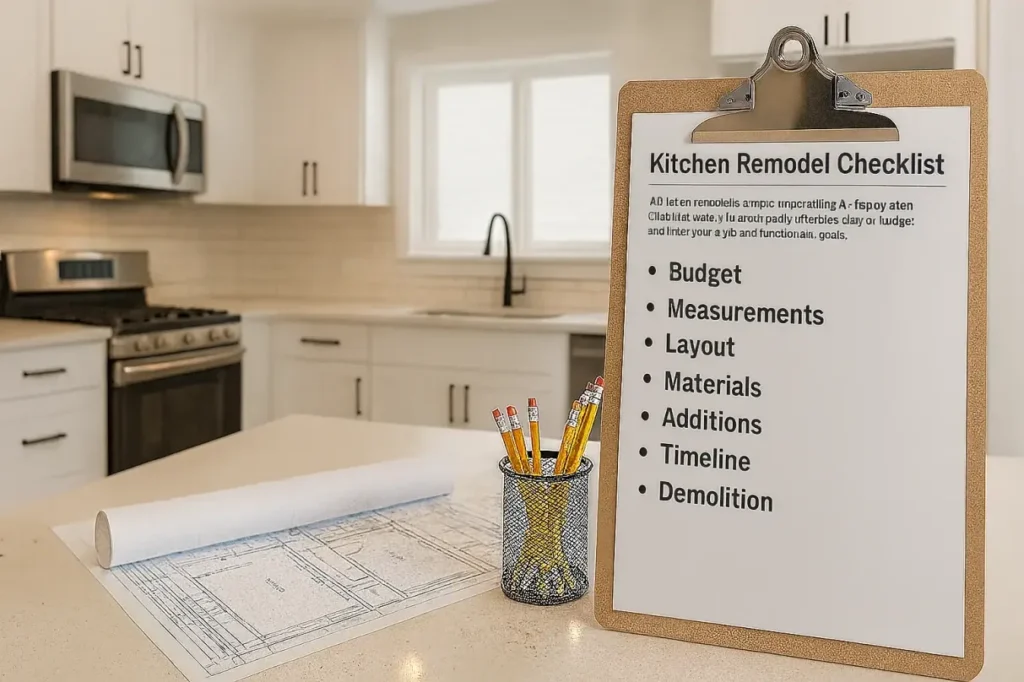
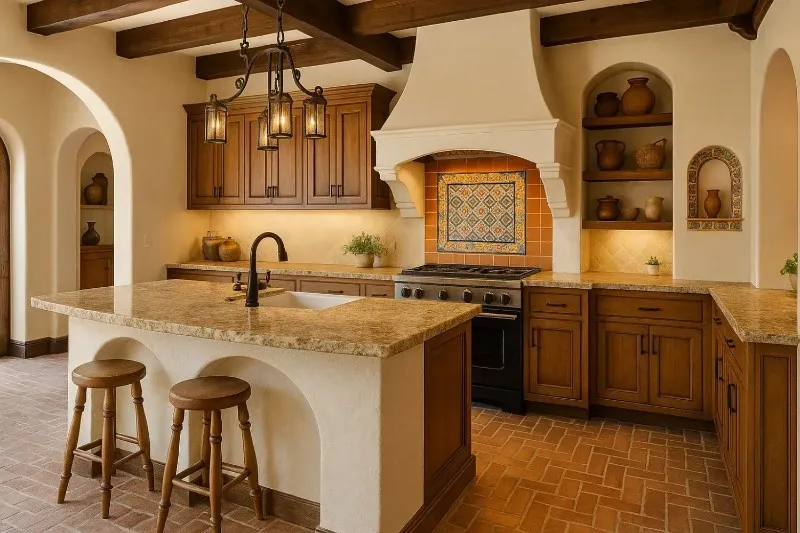
A kitchen remodel is one of the most exciting—and daunting—home improvement projects you can take on. From hidden plumbing surprises to last-minute layout regrets, it’s easy to lose track of what matters.
That’s where a detailed kitchen remodel checklist comes in. It will help you stay focused, stay on budget, and create a space that works beautifully for your lifestyle.
Step 1 – Define Your Kitchen Remodel Goals
What’s Not Working in Your Current Kitchen
Identifying specific frustrations helps ensure your remodel solves real problems—not just cosmetic ones. Use this list to guide your thinking:
- Limited cabinet storage or inaccessible corners
- Awkward workflow between key cooking zones
- Dated appliances with poor energy efficiency
- Insufficient counter space for meal prep
- Lack of seating or dining integration
- Poor lighting in key areas (sink, stove, island)
- Worn flooring, peeling cabinets, or damaged surfaces
- Not enough electrical outlets where you need them
- Cramped layout that feels closed off or crowded
- No pantry or dedicated food storage
What Are Your Must-Haves vs. Nice-to-Haves
Every kitchen remodel list should begin with clear priorities. When budget or space gets tight, this distinction will help you make smart, low-stress decisions.
| Must-Haves | Nice-to-Haves |
| A reliable dishwasher for daily convenience
Ample electrical outlets for small appliances A pantry or expanded food storage Comfortable island seating or breakfast bar Durable countertops for heavy use Quality lighting for food prep and cooking Ventilation hood that actually removes odors and smoke |
Pot filler above the stove for pasta nights
Under-cabinet lighting for ambiance and visibility Built-in wine fridge or beverage center Touchless faucet for mess-free functionality Glass cabinet doors for visual appeal Warming drawer for entertaining Smart appliances with app connectivity Drawer-style microwave for a sleeker look |
Style and Functionality Preferences
This part of your kitchen remodeling checklist helps you define the look you want—and how your kitchen should function day to day. Getting clear on your style and how you use the space will help guide everything from cabinet selection to layout.
Consider the following preferences when planning your kitchen renovation:
- A design style that reflects your taste (modern, farmhouse, transitional, etc.)
- How often you cook, entertain, or need extra seating
- Whether you prefer open shelving or closed cabinets for storage
- Your long-term goals—resale value vs. a kitchen tailored for your lifestyle
- The type of finishes you’re drawn to (bold, minimalist, classic, etc.)
- Any functional features to support kids, pets, or aging-in-place needs
- How the kitchen will flow visually and practically with adjacent spaces
Step 2 – Set a Realistic Budget
One of the most critical parts of any kitchen remodel checklist is understanding your financial limits—and how far your money can go. A smart budget keeps your project on track and prevents unnecessary compromises later.
Typical Kitchen Remodel Costs (Basic, Mid-Range, High-End)
Kitchen renovation costs vary widely depending on the size of the space, material choices, appliance brands, and whether or not you’re changing the layout.
Use this kitchen remodeling guide to understand what to expect at different investment levels:
- Basic Remodel ($10,000–$25,000):
Cosmetic upgrades like new paint, refacing cabinets, vinyl flooring, and replacing old appliances with budget models. - Mid-Range Remodel ($25,000–$60,000):
New semi-custom cabinets, quartz countertops, tile backsplash, energy-efficient appliances, and updated lighting and plumbing. - High-End Remodel ($60,000–$120,000+):
Custom cabinetry, structural changes, luxury appliances (Sub-Zero, Wolf), smart home integration, natural stone finishes, and premium design services.
Budget Breakdown (Cabinets, Appliances, Labor, etc.)
Understanding where your money will go is one of the most important things to consider when remodeling a kitchen. Here’s a more detailed kitchen remodel list with estimated costs for each component. This acts as a working kitchen renovation checklist template for budgeting.
Renovation Items & Estimated Costs:
- Cabinets: $4,000–$15,000
- Cabinet hardware: $150–$800
- Cabinet knobs/pulls: $100–$500
- Sink: $300–$1,200
- Faucet: $150–$900
- Appliances: $3,000–$12,000 (or more for luxury brands)
- Flooring (material + install): $1,500–$5,000
- Backsplash: $800–$2,500
- Countertops (quartz, granite, etc.): $2,000–$6,000
- Drywall and cement board: $400–$1,500
- Light fixtures: $300–$1,500
- Paint and primer: $200–$800
- Exhaust fan: $200–$600
- Permits and inspections: $500–$2,000
- Decorative finishes (trim, furniture, small fixtures): $300–$1,500
Total Budget Range: $15,000 to $75,000+ depending on quality and scope.
Installation Materials Cost Checklist
Even the most beautiful kitchen can fail if the behind-the-scenes materials aren’t accounted for. Use this part of your kitchen remodel checklist template to budget for necessary installation supplies—especially if you’re managing contractors or doing partial DIY.
Estimated Costs for Common Installation Materials:
- Tile adhesive and grout: $100–$300
- Drywall materials (sheets, joint compound, tape): $150–$600
- Caulk and sealant: $30–$100
- Ceiling texture and tools: $150–$500
- Window and door trim: $200–$800
- Plumbing fittings and connectors: $300–$900
- Fasteners, anchors, brackets: $50–$200
- Electrical boxes, wire, outlet covers: $200–$700
These are often missed in early planning, but including them in your contractor kitchen remodel checklist can prevent costly mid-project surprises.
Luxury Upgrades to Consider
This section of your kitchen renovation checklist is all about the nice-to-haves. These features elevate your space and make it feel truly custom—but they also come with premium pricing. Factor them in early if they matter to you.
Popular Luxury Kitchen Additions (With Estimated Costs):
- Soft-close hinges: $100–$400
- Smart appliances (Wi-Fi enabled): $1,000–$8,000+
- More space (bump-out, wall removal): $2,500–$15,000
- Dimmer switches and smart lighting: $200–$1,000
- Touch on/off faucets: $300–$800
- Kitchen island (with storage or plumbing): $2,000–$10,000
- Walk-in pantry buildout: $2,500–$6,000
- Custom cabinets: $10,000–$25,000
- Trash compactor or cabinet pull-outs: $500–$2,000
- Heated floors: $1,500–$4,000
- Built-in espresso machine: $2,500–$5,000
- High-end building materials (stone, exotic woods): $2,000–$10,000+
Add a 10–20% Contingency Fund
Even the most detailed kitchen remodel checklist template can’t predict everything. Hidden water damage, permit issues, delayed materials—these are common challenges in any renovation.
Recommended contingency:
- 10% for simple cosmetic remodels with no layout changes.
- 15–20% for structural or mid/high-end renovations involving plumbing, electrical, or walls.
For example, if your kitchen remodel list totals $40,000, you should set aside an additional $4,000 to $8,000 to cover the unexpected. If you don’t use it—great. But if you do, you’ll be glad it’s there.
Step 3 – Measure and Assess Your Current Space
Accurate measurements and spatial assessment are essential early steps in your kitchen remodel checklist. Mistakes in this phase can lead to costly installation errors, poor appliance fit, and layout issues later.
Take Precise Measurements
This step helps you and your contractor plan the layout, ensure appliances fit, and avoid costly surprises during installation. Having your own numbers gives you confidence when reviewing bids or design proposals.
Include the following in your measurements:
- Wall-to-wall dimensions (length and width of the kitchen)
- Ceiling height (important for upper cabinets, lighting, and soffits)
- Window and door locations (width, height, and distance from corners)
- Distance between walls and key utilities (gas line, water, venting)
- Existing cabinet footprint (helps compare with new layout)
- Clearance zones (space between counters, walkways, appliances)
- Appliance dimensions (fridge width, oven depth, microwave height)
- Island and seating space (ensure enough room to move around)
- Floor slope (especially in older homes — can affect cabinetry install)
Pro tip: Use graph paper or free kitchen design software to visualize your current space before making changes.
Identify Plumbing, Electrical, and Structural Constraints
Knowing what lies behind the walls is critical. These hidden systems often dictate what’s possible—or not—in your kitchen remodel. Add these to your contractor kitchen remodel checklist to ensure your plans are realistic and compliant.
Things to investigate or ask your contractor to verify:
- Plumbing lines: Can your sink, dishwasher, and fridge stay in the same location?
- Gas line placement: Needed for ranges or gas ovens—relocation can be costly
- Electrical panel capacity: Is there enough amperage for new appliances and lighting?
- Outlet and switch locations: Must meet code and your appliance layout
- Ventilation pathways: For range hoods or microwave venting
- Load-bearing walls: Cannot be moved or opened up without structural support
- HVAC ducts or radiators: May need rerouting if altering layout
- Water shut-off locations: Should be easily accessible and up to code
- Floor joists direction: Affects how you run new plumbing or ductwork below
- Asbestos or lead paint (in older homes): Requires special handling and budget
Understanding these constraints will help you plan smarter, avoid permit issues, and reduce mid-project costs. It’s a crucial part of any kitchen renovation checklist template—don’t skip it.
Step 4 – Plan the Layout and Workflow
This section of your kitchen remodel checklist focuses on how your space functions. The goal isn’t just to make your kitchen look good—it’s to make cooking, cleaning, and gathering more enjoyable and efficient.
Popular Kitchen Layouts
The layout is the backbone of your entire kitchen renovation checklist. It defines how everything fits and flows.
Common layout types to consider:
- L-Shaped: Versatile and ideal for open concept living; keeps work zones clear.
- U-Shaped: Offers excellent storage and counter space on three sides.
- Galley: Great for small or narrow kitchens; efficient but may feel closed in.
- Island Layout: Adds prep area, seating, and storage—perfect for social kitchens.
- Peninsula Layout: Similar to island, but attached; ideal for smaller footprints.
- One-Wall Kitchen: Space-saving layout for apartments and studios.
Apply the Kitchen Work Triangle Rule
The work triangle is a classic kitchen design principle. It improves efficiency by minimizing unnecessary steps between your three main work zones.
How to apply it:
- Connect the sink, stove, and fridge in a triangular pattern.
- Each leg of the triangle should be 4–9 feet.
- Avoid placing obstacles (like an island) in the triangle’s path.
- Ensure at least 42–48 inches of clearance between counters in walkways.
Open Concept vs. Defined Spaces
One of the big-picture decisions in your kitchen remodeling checklist: Should your kitchen be open to other rooms, or more contained?
| Open Concept Kitchens Offer | Defined or Closed Kitchens Offer |
| Better natural light.
Social interaction while cooking. A more modern feel. |
More wall space for cabinets.
Quieter, less distraction-prone cooking areas. Easier zoning between functions. |
There’s no wrong choice—it depends on how you live and entertain.
Step 5 – Choose Your Materials and Finishes
Now we move into the fun (and overwhelming) part of your kitchen remodel list—choosing materials. This is where style, durability, and budget need to work together.
Installation Materials Checklist
These materials are typically needed behind the scenes to prep, install, and finish your kitchen remodel correctly. Including this in your kitchen renovation checklist template ensures you budget for items that aren’t visible but are crucial.
Structural and Surface Prep:
- Subflooring (plywood or OSB)
- Underlayment (cement board, LVP underlayment, etc.)
- Leveling compound (for correcting floor slopes or dips)
- Drywall or green board (for moisture-prone areas)
- Backer board (e.g., cement board for tile surfaces)
- Joint compound and drywall tape
- Insulation (for walls behind cabinets or exterior walls)
Electrical:
- Electrical wire (Romex or equivalent)
- Outlet boxes and junction boxes
- Electrical outlets (standard, GFCI, USB combo)
- Switches and dimmers
- Circuit breakers (if adding dedicated circuits)
- Wire nuts, electrical tape, faceplates
Plumbing:
- PEX or copper pipes
- Shut-off valves
- Fittings (tees, elbows, couplings)
- Drain traps and extensions
- Teflon tape and pipe insulation
Fasteners & Connectors:
- Screws and nails (wood, drywall, framing)
- Cabinet mounting brackets
- Anchors and toggle bolts
- Shims for cabinet and appliance leveling
- Construction adhesive (for drywall, trim, panels)
Tile & Surface Installation:
- Thinset mortar or mastic adhesive
- Grout (sanded or unsanded)
- Caulk (paintable and silicone for wet areas)
- Tile spacers
- Notched trowel, grout float, mixing bucket
Finishing Materials:
- Paint and primer (including kitchen-rated moisture-resistant paint)
- Trim and molding
- Touch-up kits for cabinetry
- Toe-kick boards and filler strips
- Silicone sealant for sink edges
Cabinets and Storage Solutions
Cabinets are usually the biggest-ticket item in your kitchen remodel checklist. Choose options that reflect how you use the kitchen—not just how you want it to look.
Cabinet choices and features to consider:
- Stock: Affordable, fast, limited size and color choices.
- Semi-custom: More flexible, good quality, moderate pricing.
- Custom: Built to fit any space, premium materials and finishes.
- Add-ons: soft-close doors, pull-out drawers, lazy Susans, tray dividers, toe-kick storage.
Countertops (Quartz, Granite, Butcher Block, etc.)
Your countertops need to handle daily use, heat, moisture, and stains—while anchoring your kitchen’s look.
Top materials to explore:
- Quartz: Low-maintenance, non-porous, consistent look, ~$60–$120/sq ft
- Granite: Natural beauty, heat-resistant, needs sealing, ~$40–$100/sq ft
- Butcher block: Warm and inviting, ideal for prep zones, ~$30–$70/sq ft
- Marble: Elegant but high-maintenance, ~$80–$150/sq ft
- Laminate: Budget-friendly and improving in quality, ~$20–$50/sq ft
Include a note in your kitchen remodel checklist template about fabrication lead time—some counters take weeks to cut and install.
Flooring (Tile, Vinyl, Hardwood)
Your kitchen floor sees constant traffic, spills, and temperature changes. Make sure your choice matches your lifestyle and cleanup tolerance.
Popular kitchen flooring types:
- Tile: Waterproof, durable, and endless design choices.
- Luxury vinyl plank (LVP): Affordable, looks like wood or stone, easy to install.
- Engineered hardwood: Warmer feel than tile, more moisture-tolerant than solid wood.
- Polished concrete: Modern and durable but may need rugs for warmth.
Backsplash Options
A backsplash protects your walls from spills and adds style and texture to your space. It’s also one of the most fun and personal elements to design.
Common backsplash materials:
- Subway tile: Classic, clean, affordable
- Glass tile: Modern and reflective
- Natural stone (slate, marble): Rustic or upscale depending on cut
- Metal/stainless steel: Industrial, easy to wipe down
- Full-slab backsplash (quartz, granite): Luxurious and seamless
Include backsplash installation timing in your contractor kitchen remodel checklist—it typically comes after countertop installation.
Hardware and Fixtures
Finishing touches like knobs, pulls, faucets, and lighting can elevate a kitchen and pull the whole look together.
Checklist of key fixtures:
- Cabinet handles and drawer pulls (match or contrast with faucet finish)
- Sink faucet: pull-down, touchless, bridge, or commercial-style
- Undermount, apron-front, or drop-in sink
- Lighting: pendants, under-cabinet, ceiling, and toe-kick LED strips
- Electrical outlets and switch plate covers
Step 6 – Select Appliances and Lighting
Choosing appliances and lighting is one of the most exciting parts of the kitchen remodeling checklist—but it’s also one of the easiest places to go over budget. This step helps you align your selections with your layout, energy use, and aesthetic preferences.
Energy-Efficient Appliance Options
Modern kitchens demand high performance with lower utility bills. ENERGY STAR-rated appliances not only cut long-term energy costs—they may also qualify for rebates in some areas (including Orange County).
Appliances to include in your kitchen remodel checklist:
- Refrigerator: Side-by-side, French door, or built-in; $1,000–$10,000
- Range or cooktop: Gas, electric, or induction; $800–$5,000
- Wall oven: Optional but great for accessibility and layout flexibility
- Dishwasher: Look for quiet operation and adjustable racks; $500–$2,000
- Microwave or drawer microwave: Standard or built-in under counter
- Vent hood or range hood: Ducted or recirculating; $250–$2,500
- Beverage fridge or wine cooler: Optional luxury; $400–$1,500
Built-in vs. Freestanding Appliances
Your kitchen’s layout will dictate what appliance types make sense.
Built-in appliance pros: Seamless integration with cabinetry; Cleaner, modern appearance; Custom panel options available.
Freestanding appliance pros: Easier to install and replace; More budget-friendly; Greater range of available models.
Task, Ambient, and Accent Lighting
Lighting affects how your kitchen feels and functions. Your kitchen renovation checklist should include a layered lighting plan—because no single light can do it all.
Types of lighting to install:
-
- Task lighting: Under-cabinet lights, pendant lights over islands, over-the-sink fixtures.
- Ambient lighting: Recessed ceiling lights or flush mounts for general illumination.
- Accent lighting: LED toe-kick lights, cabinet interior lighting, dimmable mood lights.
- Decorative lighting: Statement chandeliers or pendant clusters.
- Smart Lighting: App or voice-controlled systems.
- Integrated Lighting in Fixtures/Furniture.
- Color-Changing or Tunable Lighting.
Lighting fixtures cost from $50 to $1,000+ each, so plan early and match finishes with your hardware and faucets.
Step 7 – Hire the Right Professionals
Choosing the right team is one of the most important steps in your kitchen remodel checklist. Look for licensed contractors with strong reviews, a clear portfolio, and upfront pricing. Whether you hire a general contractor or a full-service design-build firm depends on your project scope and how involved you want to be.
In most areas—including Orange County—your contractor should handle permits, but always confirm it’s included in your kitchen renovation checklist template.
For a smooth, well-managed remodel, trust the experts at Laguna Bay Developing. Their team handles everything from design to final walkthrough with precision and care.
Step 8 – Create a Timeline and Prepare for Demolition
Most kitchen renovations take 6–12 weeks once construction begins. Build extra time into your kitchen remodel checklist for design, permits, and material delays. Stay flexible—it helps reduce stress.
During demolition, set up a temporary kitchen with essentials like a mini fridge, microwave, and portable cooktop. Choose a low-traffic spot to keep your routine manageable.
Step 9 – Track Progress and Handle Surprises
No matter how detailed your kitchen remodeling checklist is, delays happen. Track weekly milestones, stay in communication with your contractor, and adjust quickly when timelines or scope change. Staying organized keeps the remodel—and your sanity—on track.
Checklist for Weekly Progress
Use this as a running punch list to confirm milestones and detect issues early. You can adapt it for your contractor kitchen remodel checklist or use it to guide project meetings.
- Week 1: Demolition complete, site cleared, dumpster removed
- Week 2: Framing, plumbing, and electrical rough-ins complete
- Week 3: Inspections passed, insulation and drywall installed
- Week 4: Cabinet bases installed, flooring begins or is prepped
- Week 5: Countertops templated, tile backsplash installation starts
- Week 6: Countertops installed, lighting and appliances delivered
- Week 7: Final plumbing and electrical connections made
- Week 8+: Punch list created, paint touch-ups and finishing work completed
How to Deal with Delays or Scope Changes
Even well-planned kitchen renovations may face setbacks. The key is staying calm and flexible—and having a process for change.
- Document everything in writing (texts, emails, contracts)
- Request change orders for scope adjustments, including costs and time impacts
- Ask for revised timelines when material delays or inspections stall progress
- Communicate frequently—weekly check-ins help prevent misalignment
- Prioritize critical tasks (like cabinetry or countertops) to stay on schedule
- Be flexible but firm—not all upgrades are worth blowing the budget
These are normal challenges in any kitchen remodel list—what matters is how you handle them.
Step 10 – Final Walkthrough and Punch List
Before closing out your kitchen remodel, take time for a detailed walkthrough to ensure everything meets expectations.
- Inspect cabinets for alignment, smooth operation, and soft-close functionality
- Check paint, trim, and tile grout for cracks, chips, or uneven finishes
- Test lights, outlets, switches, and under-cabinet lighting
- Confirm appliances are installed correctly and functioning
- Run sink, faucet, and dishwasher to check for leaks or drainage issues
- Ensure hardware and fixtures are secure and level
- Look for dust and debris inside drawers, cabinets, and vents
- Finalize your punch list of any touch-ups or unfinished work
- Collect all warranties, manuals, and product registration info
Expert Tips to Make Your Kitchen Remodel Easier
Even with the most detailed kitchen remodel checklist, unexpected challenges can pop up. These tips can help you stay one step ahead:
- Order materials early. Some items—like custom cabinets or quartz countertops—have long lead times that can delay the project.
- Stick to your plan. Last-minute changes can cause delays and increase costs. Finalize your kitchen renovation checklist before the demo starts.
- Label everything. During demo and storage, labeling boxes and parts (like hinges, trim, or lighting) will save headaches later.
- Stay flexible. Give yourself buffer time and budget room for the inevitable surprises.
- Keep a project binder. Organize receipts, appliance manuals, paint swatches, and your kitchen remodel checklist template all in one place.
Common Kitchen Remodeling Mistakes to Avoid
Many kitchen renovation headaches come from a few avoidable missteps. Use this as a quick reference to keep your remodel smooth and regret-free.
Overpersonalizing the Design
Ultra-specific style choices can hurt resale value later. Aim for a timeless base, and add personality with accessories or paint.
Choosing Trend Over Function
A floating shelf looks great—until you realize you miss your upper cabinets. Prioritize storage and workflow first.
Not Planning for Storage or Workflow
Your kitchen remodel list should include drawer organizers, trash pull-outs, and zone planning for cooking, cleaning, and prep.
Skipping the Permit Process
Avoid fines, inspection issues, and safety hazards by pulling the right permits. It’s not just a formality—it’s essential.
Start Planning Your Dream Kitchen Today with Laguna Bay
A well-executed kitchen remodel adds comfort, functionality, and lasting value to your home. Whether you’re doing a full renovation or a targeted upgrade, a clear kitchen remodeling checklist gives you control and confidence at every stage.
But you don’t have to do it alone. Laguna Bay Developing offers full-service kitchen remodeling in Orange County. From design consultations to permits and flawless execution, their team helps you bring your dream kitchen to life—with zero guesswork and maximum peace of mind.
FAQ
What should I do first when planning a kitchen remodel?
Start by assessing your current space and defining your goals. A good kitchen remodel checklist begins with identifying what’s not working and what you want to improve.
What is the most expensive part of a kitchen remodel?
Cabinetry is often the biggest cost, taking up 25–30% of your budget. Labor and countertops also make up a significant portion of any kitchen remodel list.
What is the kitchen work triangle, and why does it matter?
The kitchen work triangle connects your sink, stove, and fridge for efficient movement. It’s a core principle in any kitchen renovation checklist focused on functionality.
In what order should you renovate a kitchen?
Typical order: planning → demolition → rough-ins → inspections → flooring → cabinets → countertops → backsplash → appliances → finishing touches. This sequence helps your checklist for kitchen remodel stay on schedule.
What not to do when renovating a kitchen?
Avoid skipping permits, underestimating storage needs, or over-focusing on style instead of function. Many common mistakes can be avoided with a solid kitchen remodel checklist template.
Should you replace backsplash or countertops first?
Countertops should go in first. Then the backsplash can be measured and installed cleanly above it without awkward gaps or cuts.
How do I track progress during the remodel?
Use a weekly kitchen remodeling checklist to mark completed tasks, manage delays, and coordinate with your contractor. A spreadsheet or printed template works well.

